Install Lamp in Linux / Ubuntu From Start :
In this guide, I will teach you how to install Lamp system. Lamp stands for Linux, Apache, MySQL and PHP this is the lamp software package where the PHP can be interchangeable. In the Linux/Ubuntu the package of software installed by using commands using the terminal.
Install Apache:
Let's start the installation process first, install the Apache.
Step 1) Open your terminal either by clicking the icon of terminal or by pressing the shortcut key
( Alt+Ctrl+t ).
Step 2) Write the line of code or paste it into the terminal and then press the enter key.
sudo apt-get install apache2Step 3) Then the terminal will ask you for your system password, type the password and press enter button.
Test Apache installation:
To make sure that we have installed the Apache server successfully we now test it.
Step 1) Open browser ( browser that you have installed on your system ) and write or copy-paste the below line in the web address bar:
http://localhost/or
127.0.0.1/You should see the folder named Apache2-default/. Open the folder it will say "It works" congratulation to you for first step completion.
Install PHP:
In this part of the tutorial, we will install the PHP version 5.
Step 1) Again Open your terminal either by clicking the icon of a terminal or by pressing the shortcut key ( Alt+Ctrl+t ).
Step 2) Write the line of code or paste it into the terminal and then press the enter key:
sudo apt-get install php5 libapache2-mod-php5
Step 3) For PHP to work and compatible with the Apache server we have to restart the Apache server.
Type the command/code in Terminal to do this:
sudo /etc/init.d/apache2 restartNow PHP installation completed and we will test that the PHP is installed successfully of not.
Test PHP:
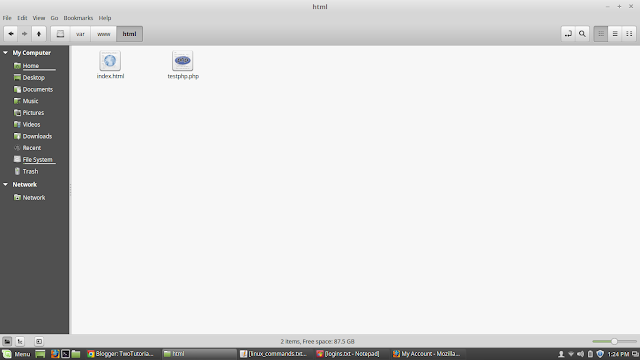
A quick test runs to ensure that the PHP version 5 installed successfully. Here one important thing in some of the Linux versions the /www/html/ is the default path set. so we will create the file in the HTML folder or have to change the path.
Step 1) Write the line of code or paste it into the terminal and then press the enter key:
sudo gedit /var/www/html/testphp.php
Step 2) Then open the file copy paste the code or you may be can type anything of PHP.
<?php phpinfo(); ?>Step 3) Save and close the testphp.php file.
Step 4) Now open your web browser and copy paste or write the link in web address bar.
http://localhost/testphp.php
This image will be displayed and detail of the PHP.
Install MySQL:
Last Lamp component that is MySQL software is remaining to install.
Step 1) Again open the terminal and copy-paste or write the code in the terminal.
sudo apt-get install mysql-serverStep 2) Terminal will ask you for the password write the password and enter.
Step 3) MySQL root user require the password to set. Then set the root password.
That's it.
Test MySQL:
Now we can test that the MySQL installed correctly or not so PHPMyAdmin is the admin panel.
Step 1) Open the web browser and enter the code in the web address bar that is URL.
http://localhost/testphp.phpNow if there is something wrong then follow some steps.
Open the terminal and copy and paste the code and press enter.
sudo ln -s /etc/phpmyadmin/apache.conf /etc/apache2/conf-available/phpmyadmin.confThen again open browser and copy paste the URL in the address bar.
sudo ln -s /usr/share/phpmyadmin /var/www/html/phpmyadmin
sudo service apache2 restart
http://localhost/testphp.php
That's it. Lamp server is not installed on the Linux mint 17.3 and Ubuntu. If you people have still any query about an installation of lamp software package feel free to ask here in the comment. You can google search for more reading about the lamp server search with quries run lamp server ubuntu, install lamp ubuntu 14.04 server, ubuntu lamp, linux install lamp, how to run lamp in ubuntu, lamp commands, install lamp ubuntu 15, best linux lamp server and much more. We will solve it and inform you quickly. You can further study about the how you can earn money online.
How you can earn money online?
This Post Was Last Updated On September 30, 2016, By Author: Mahira Khan.


0 comments:
Post a Comment